Tuning Semi-Automatic Rifles with Gas Regulation
Upgrading your rifle usually starts with controlling how much gas drives the operating system. Most factory-built autoloading rifles are deliberately overgassed so they cycle reliably with cheap, underpowered target ammunition in dirty conditions. While this guarantees the bolt carrier cycles, it causes aggressive recoil, increased bolt bounce, and accelerated wear on critical internal pins. Installing an adjustable gas block gives you direct control over gas flow through the barrel port, allowing you to choke back excessive pressure and smooth out the operating stroke.
Adjusting the gas volume becomes especially vital when introducing a sound suppressor to your rifle platform. Adding a silencer significantly increases backpressure within the bore, forcing hot gases and carbon backward through the gas tube and straight toward the shooter. By working with hardware sourced through specialized Class 3 / NFA dealers, you can dial down the gas flow to the bare minimum needed to lock the bolt back on an empty magazine, resulting in a cleaner receiver and dramatically softer cycling.
Most adjustable assemblies use a set screw or a detent-style click selector located directly on the forward face of the collar. Tuning typically involves opening the port completely, loading a single cartridge into the magazine, firing, and gradually restricting the flow until the bolt fails to lock back on empty. Once that threshold is reached, opening the valve by one or two detent clicks usually provides the sweet spot where the rifle retains all-weather reliability without unnecessary bolt speed and physical battering.
When installing an aftermarket collar, alignment with the barrel gas port requires absolute precision. Even a fraction of a millimeter off-center can choke gas flow prematurely, creating cycling issues that resemble weak ammunition or worn buffer springs. Taking your time to measure barrel shoulder distance or using dimpling jigs ensures the block stays firmly anchored against repeated heat expansion cycles and heavy vibrations during long practice sessions.
Managing Gas Systems on Proprietary Carbines
While modern modular rifles feature slip-on gas collars, older proprietary carbines utilize unique mechanical arrangements. Platforms like the classic ranch carbine incorporate a two-piece gas block held together by four retention screws around the barrel, enclosing a removable internal bushing. These traditional designs are notoriously overgassed straight from the factory, frequently ejecting empty brass cases thirty feet away and generating sharp harmonic vibrations through the pencil-thin barrel profile.
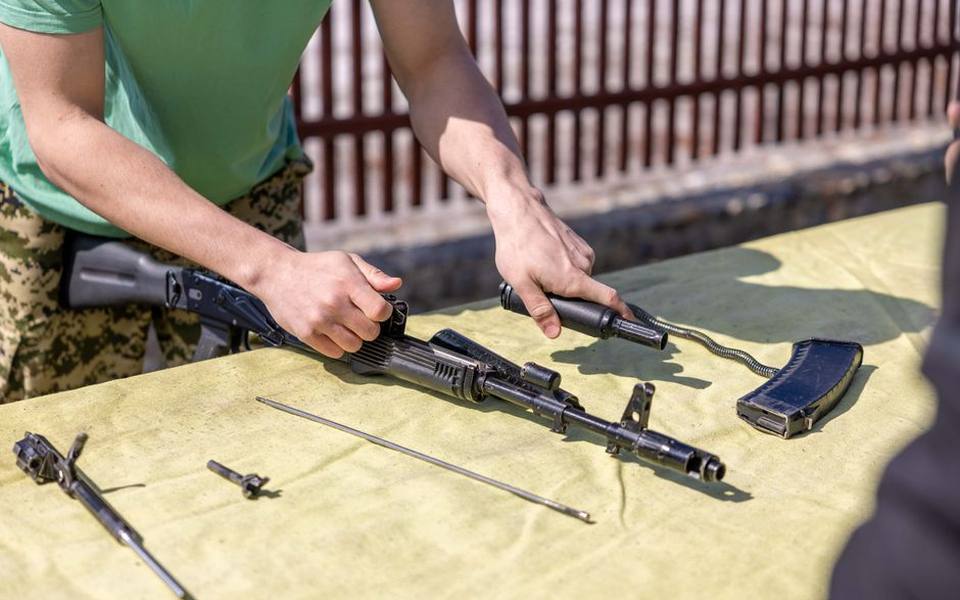
Fitting an aftermarket regulated gas block on a traditional carbine like the Mini 14 allows owners to eliminate violent action cycling without altering the external profile of the firearm. Some replacement units incorporate an adjustable dial screw directly beneath the front sling swivel, while others rely on a series of interchangeable gas bushings with varying internal diameters. Reducing the orifice diameter tames the aggressive slam of the operating slide against the receiver front face.
In addition to softening felt recoil, taming the internal pressure helps preserve the longevity of mounted optics. The forward shockwave produced when a heavy operating rod slams against a steel receiver is notorious for shearing scope mounting screws and shaking internal reticles loose on entry-level scopes. Installing a regulated gas assembly combined with a small synthetic buffer absorbs those abrupt metal-on-metal impacts, dramatically extending the lifespan of your optics setup.
When installing these specialized carbine blocks, tightening the assembly screws evenly is critical for maintaining mechanical accuracy. An uneven gap between the top and bottom halves introduces barrel stress that causes your point of impact to shift unpredictably as the barrel heats up. Utilizing an accurate inch-pound torque wrench to tighten the four mounting screws in a crisscross pattern ensures balanced pressure across the entire barrel diameter.
Tactical Lighting Mounts for Pump-Action Shotguns
A defensive shotgun is fundamentally incomplete without a dependable source of target identification, yet mounting lights on pump platforms poses distinct mechanical hurdles. Unlike standard rifles with continuous receiver rails, a pump shotgun moves its primary support hand forward and backward along the slide assembly during cycling. Attaching a flashlight mount to a budget-friendly utility shotgun like the Maverick 88 requires finding a stable mounting location that does not pinch your fingers or bind against the forend.
Because entry-level models often integrate the action bars directly into the synthetic forend rather than using a separate slide tube, standard slip-on accessory handguards rarely fit without substantial modification. A common alternative is a barrel-and-magazine tube clamp that provides a short section of rail just forward of the sliding forend. These aluminum clamps position the illumination bezel close to the muzzle, preventing the barrel from casting a wide, blinding shadow across your field of view in darkened rooms.
Another reliable approach involves securing a replacement magazine tube cap featuring an integrated accessory stud or mini Picatinny rail. This keeps the light hardware forward of all moving components, completely preventing hand interference while running the pump action aggressively under stress. Whichever mount you choose, make sure the switch activation aligns naturally with your non-dominant thumb when resting in your standard shooting position.
Recoil forces generated by twelve-gauge defensive loads place intense physical stress on mounting screws and light bezels. Standard threaded fasteners will quickly back out under the sharp impulse of high-brass buckshot or solid slugs if installed dry. Applying medium-strength thread-locking fluid to every mounting bolt and regularly checking hardware tension after range visits prevents your lighting equipment from vibrating loose when you need it most.
Shotgun Choke Tube Maintenance and Removal Techniques
Interchangeable choke systems grant incredible versatility across hunting, clay shooting, and home defense disciplines, but they demand routine mechanical care. When shotshells are discharged, hot combustion gases, carbon debris, and plastic wad residue drive into the tiny tolerance seam between the choke tube and the barrel threads. Over months of neglect or wet hunting conditions, this fouling can oxidize and lock the component in place, turning what should be a simple barrel swap into a serious mechanical headache.
Extracting a stubborn or frozen tube starts with a properly matched shotgun choke removal tool designed to engage the internal notches of the insert. Standard flat friction keys often slip under high rotational torque, rounding off the delicate brass or steel notches inside the barrel crown. High-grade universal ratchet-driven tools or internal expanding wrenches grip the interior circumference evenly, distributing torque without warping the thin metal walls of the choke.
If a choke refuses to budge under hand pressure, never force the tool using an extended cheater bar, as this can twist the barrel muzzle out of round or strip the delicate internal threads. Instead, soak the muzzle overnight in a shallow container of quality penetrating fluid to dissolve built-up carbon and loosen surface corrosion. In stubborn cases, submerging the barrel tip in an ultrasonic cleaner or consulting a certified gunsmith will protect the factory bore from permanent damage.
Preventing thread seizure requires minimal effort during standard cleaning routines. Every time you clean your shotgun bore, unscrew the choke completely, brush the barrel threads clean of lead deposits, and apply a thin coating of high-temperature anti-seize compound or dedicated choke grease. Reinstall the tube firmly by hand using your wrench, ensuring it sits flush against the internal shoulder without over-tightening.
Optic Configurations for Handgun Slides
Equipping a handgun with an electronic sighting system provides massive speed advantages, allowing shooters to remain focused on the target rather than struggling with three-plane front-and-rear sight alignment. While large tube-style holographic sights remain common on carbines, mounting true holographic optics on a handgun slide is structurally impractical due to their heavy optical prism assemblies and significant battery housings. Instead, shooters seeking fast target acquisition on handguns like the Glock turn to rugged micro reflex sights that share similar rapid-acquisition reticle patterns.
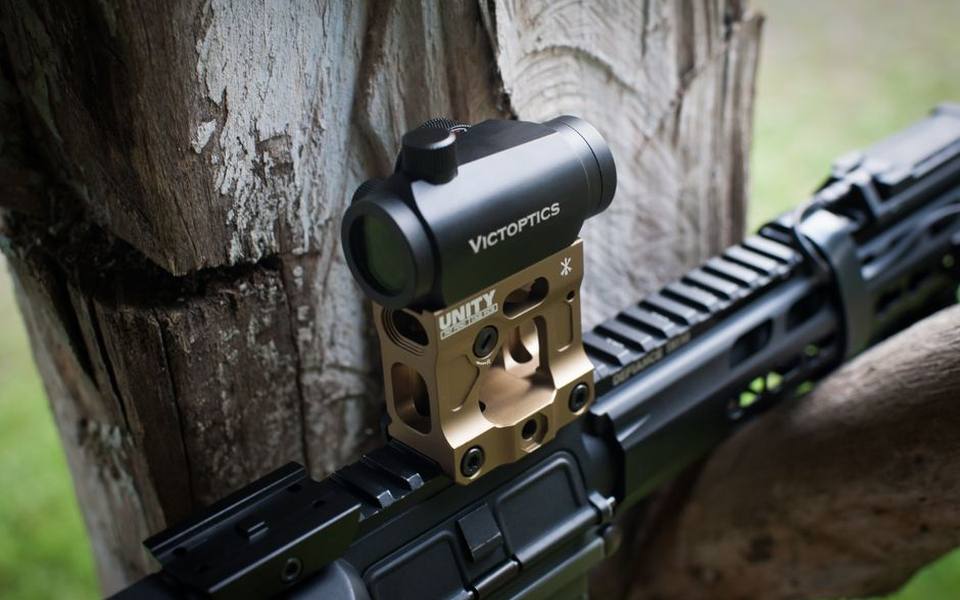
Mounting an optic securely to a reciprocating slide requires careful attention to footprint standards and mounting plate thickness. When an optic-ready slide cycles, the red dot optic experiences thousands of gravities of directional acceleration and violent braking every time a shot is fired. Direct-milled slides that seat the optic deep into the steel provide the strongest interface, lowering the sight picture so factory-height or suppressor-height iron sights can co-witness through the lower third of the glass window.
Shooters who frequently experiment with hand-tuned ammunition built using supplies from shops carrying reloading supplies should monitor their optic mount screws closely. Stouter powder charges or heavy defensive bullet weights change the slide recoil velocity, transferring distinct harmonic stresses into the mounting platform. Using hardened alloy screws torqued precisely to the optic manufacturer's specified values prevents sheared fasteners on the range.
Selecting the right reticle configuration depends largely on your intended shooting distance and ambient lighting requirements. Large dot diameters or circle-dot combinations mimic the intuitive presentation of holographic carbine optics, making them ideal for rapid close-range self-defense drills. Smaller fine-point reticles, on the other hand, provide a clearer sight picture for precision target work at distances beyond twenty-five yards without obscuring small steel plates.
Striker Assemblies and Firing Pin Maintenance
Internal ignition mechanisms operate under continuous friction, spring tension, and impact force, making them subject to gradual mechanical fatigue over high round counts. The firing pin or striker assembly directly strikes the cartridge primer, absorbing intense reverse pressure pulses back into the breech face. Routine cleaning often overlooks the internal channel where these components reciprocate, allowing unburned propellant powder, brass shavings, and dried oil to accumulate into a sticky paste.
Executing a firing pin replacement is a fundamental maintenance task that every seasoned firearm owner should understand. Over prolonged use, dry-firing without snap caps or shooting thousands of rounds can cause micro-fractures along the impact tip, leading to light primer strikes, misfires, or piercing primer cups. Replacing a worn pin requires detail-stripping the bolt or slide assembly, checking the channel liner for gouges, and inspecting the return spring for compression loss.
When purchasing replacement pins, you will encounter standard factory carbon steel components as well as aftermarket upgrades made from heat-treated titanium or polished stainless alloys. Titanium pins offer reduced mass for marginally faster lock times, but they can be more brittle than quality tool steel under repetitive, hard impacts. For everyday carry and home protection, original equipment manufacturer dimensions and standard metallurgical specs typically offer the best balance of ductility and longevity.
Keep the internal striker channel completely free of liquid lubricants and gun grease during reassembly. Wet lubricants attract particulate fouling like a magnet, creating hydrodynamic drag that slows pin velocity in cold climates and leads to unexpected ignition failures. Clean the channel using non-chlorinated solvent, wipe it dry with clean cotton swabs, and assemble the striker dry to guarantee crisp, uninterrupted travel.
Understanding Firing Pin Markings and Identification
A common point of confusion among new gun owners concerns regulatory markings and serial numbers on internal firearm components. With very few specialized exceptions, a firing pin does not carry a unique serial number tied to firearm registration or federal tracking forms. Under federal regulations, the serialized firearm receiver or frame is the only legally recognized gun component; internal replacement parts like extractors, springs, and firing pins are classified as non-serialized consumables.
When examining an internal component, you might spot tiny stamped digits, single letters, or raised forge marks on the body of the pin. These markings are batch inspection stamps, foundry codes, or caliber indicators stamped during factory manufacturing to prevent factory line workers from installing the wrong pin in a similar receiver frame. They do not correlate to your primary firearm serial number, nor do they appear on transfer paperwork executed at FFL transfer dealers.
Discussions surrounding microstamping technology occasionally generate false impressions about serial numbers on striking components. Microstamping refers to proposed or state-level legal concepts where microscopic codes would be laser-etched onto the very tip of a firing pin to transfer an imprint onto the cartridge primer during ignition. In practical consumer firearms, this technology remains virtually nonexistent in production models due to rapid tip wear, carbon obscuration, and straightforward part replacement by end users.
If you are inspecting pre-owned firearms at local used gun stores, finding an aftermarket or unmarked firing pin inside the bolt simply indicates standard routine maintenance by the previous owner. Inspecting the pin for uniform tip roundness, smooth shaft polishing, and proper spring collar retention matters far more to your safety and firearm function than the presence of factory production stampings.
Fiber Optic Sight Technology Across Shooting Disciplines
High-visibility aiming technology shares deep mechanical roots between modern archery equipment and defensive firearms. Modern hunting compounds rely heavily on brightly colored light-gathering rods in their multipin sights to provide an illuminated reference point during low-light dawn and dusk hours. The exact same optical principles that power fiber optic archery sights have become a dominant standard across competitive handgun setups, shotgun front beads, and backup rifle iron sights.
Fiber optic rods work through total internal reflection, capturing ambient daylight along their entire elongated exposed length and funneling that light out through the trimmed ends facing the shooter. This creates a brilliant, glowing dot that naturally draws your eye without requiring batteries, wires, or internal circuitry. In daylight or brightly lit indoor bays, an orange or vivid green fiber element accelerates your front sight acquisition significantly compared to traditional black steel posts.
The primary vulnerability of fiber sighting hardware lies in mechanical durability compared to solid steel iron sights. Thin acrylic or plastic filaments can snap if struck by tree branches during dense field navigation or if subjected to extreme solvent exposure during harsh chemical cleanings. When outfitting a hunting bow or field firearm, look for sighting housings that feature protective steel hoods or recessed channels designed to shield the delicate fiber strand from side impacts.
Replacing or swapping colors in a fiber sight is a fast bench task that requires only a few minutes and basic household supplies. Simply clip out the cracked or faded filament, feed a fresh rod through the housing holes, trim the excess with a razor blade, and gently approach the plastic tip with a standard flame lighter. The radiant heat will cause the acrylic end to mushroom outward into a smooth, clean retaining bead that locks securely into the steel notch.
Loadout Organization with Modular Belt Systems
Upgrading your shooting experience goes beyond tuning the mechanical internals of the firearm itself; how you carry spare ammunition, medical gear, and secondary tools directly dictates your capability on the range. A modern two-piece tactical battle belt has largely superseded traditional bulky web harnesses for tactical training and field carry. By anchoring an inner loop-lined belt through your standard pants loops and locking a rigid outer equipment belt over top, you establish a consistent, shift-free platform for heavy gear.
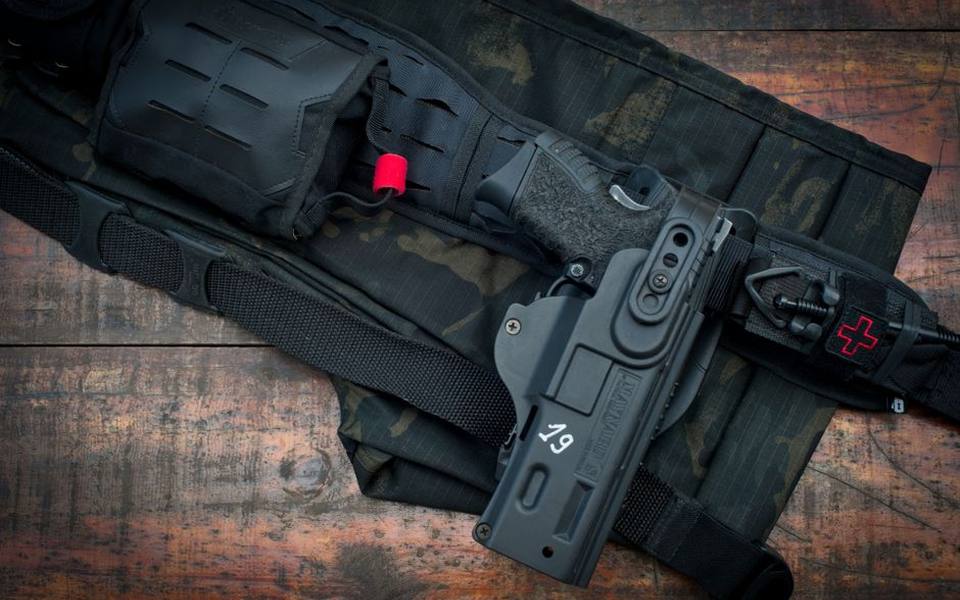
The rigidity of the outer load-bearing belt prevents holsters and magazine pouches from twisting or sagging outward under their own weight. Heavy nylon webbing reinforced with internal polymer stiffeners keeps your handgun holster oriented at the exact angle you establish, ensuring an unhindered draw stroke every time. Meanwhile, modular attachment grids allow you to distribute weight evenly around your hips, taking painful pressure off your lower spine during long days on the firing line.
Prioritization is everything when configuring pouches on your support platform. Your non-dominant side should carry primary pistol and rifle reload pouches oriented for swift index finger indexing, while the dominant hip remains dedicated solely to a secure retention holster. The rear lumbar area is best reserved for a compact trauma kit or a flat dump pouch, leaving the front buckle area clear so you can sit, kneel, and bend freely without pinching.
Before taking a newly assembled belt rig into a dynamic training course, run simple functional movement drills inside your home to verify clearance. Bend over, drop into a double-knee shooting posture, and draw both primary and secondary tools to ensure nothing snags or shifts out of place. Setting your gear up systematically ensures that your physical loadout complements your firearm upgrades perfectly.
Balancing Home Modifications with Professional Workshop Care
Tackling firearm upgrades at home provides deep insight into mechanical function, but recognizing your personal mechanical limits is the hallmark of a responsible owner. Swapping an optic plate, threading in an illuminated sight rod, or slipping on a defensive light mount are straightforward tasks requiring only basic torque drivers and patience. However, complex jobs involving barrel threading, gas port reaming, or custom slide machining carry safety implications that demand professional equipment.
Whenever an upgrade involves the physical removal of receiver metal or precise changes to headspace tolerances, handing the job over to an experienced workshop is well worth the investment. An incorrect gas block journal fit can ruin an expensive barrel, while improperly fitted safety catches or firing pin blocks can render a firearm dangerously drop-unsafe. Developing a working relationship with your local gun shop ensures you have expert guidance whenever an installation encounters unexpected resistance.
Taking an organized, measured approach to parts upgrades ensures you will enjoy years of smooth cycling and tight groups from your rifle, handgun, and shotgun platforms. Always test-fire newly upgraded setups in a controlled range environment with various ammunition types before relying on them for critical defensive applications. With the right hardware, proper maintenance habits, and realistic mechanical boundaries, tuning your firearms yields unparalleled reliability and shooting confidence.
Published 2026-09-21 · reviewed with each rebuild, last September 2026.
Find gun stores near you
The directory lists 12,328 gun stores by state and city — pick your state or use the “Near me” button in the header.
More guides
-
 Buying
Night Vision, Caliber Choices, and Hearing Protection: The Practical Buyer Guide
-
 Owning
Muzzle Brakes vs Pistol Compensators: Mechanics, Tuning, and Ownership Costs
-
 Owning
Where to Get Fingerprints for Gun Permits, Hearing Gear, and Range Prep
-
 Owning
How to Remove Rust from a Gun Safely Without Damaging the Finish
-
 Buying
Choosing a Skeet Shotgun: Balance, Gauges, and Barrel Specs
-
 Safety
Stun Guns, Tasers, and Protective Range Gear: Practical Buyer's Guide
-
 Buying
Choosing Practical Firearms for Home Defense and Daily Carry
-
 Buying
FFL Transfer Fees and Process Explained: What to Expect at the Counter
-
 Service
Fingerprinting Services, IdentoGO, and FBI Background Checks: The Complete Guide
-
 Safety
Indoor and Outdoor Shooting Ranges: Etiquette, Rules, and Memberships
-
 Storage
Gun Safes and Fireproof Storage: Biometric Safes, Cabinets, and Dehumidifiers
-
 Safety
Body Armor and Ballistic Plates: Threat Levels, Plate Materials, and Carrier Sizing
-
 Safety
Shooting Hearing Protection: Electronic Earmuffs, Custom Earplugs, and Noise Reduction
-
 Owning
Shooting Targets, Clay Throwers, and Range Rests Guide
-
 Owning
Concealed Carry Holsters: Kydex, Leather, IWB, OWB, and Specialized Rigs
-
 Owning
Rifle and Shotgun Slings: Single-Point, Two-Point, and Mounting Hardware
-
 Owning
Everyday Carry and Tactical Accessories: Range Bags, Gun Locks, and Practical Gear
-
 Owning
Gun Cleaning Kits and Maintenance: Cleaners, Oils, and Solvents
-
Safety
Everyday and Noise Reduction Earplugs: A Practical Comparison Guide
-
 Safety
Firearm Safety Rules, Concealed Carry Courses, and Tactical Shooter Training
-
 Service
Rifle Customization, Caliber Selection, and Bench Work: A Guide to Practical Gunsmithing and Reloading
-
 Safety
Shooting and Hearing Protection: Guide to Earmuffs, Plugs, and Electronic Defenders
-
 Buying
Choosing Spotting Scopes, Binoculars, and Specialized Night Optics
-
 Safety
Active Shooter Response, Tactical Handgun Courses, and Firearm Safety Training Guide
-
 Buying
Night Vision Optics and Spotting Scopes Buyer's Guide
-
 Buying
Firearm Valuation, Appraisal, and Used Buying Guide
-
Safety
Layering Personal Defense: Less-Lethal Tools, Purpose-Built Firearms, and Medical Gear
-
 Buying
Hunting Ammunition, Calibers & Reloading Supplies Guide
-
 Owning
Concealed Carry Reciprocity, Licensing Basics, and Buying Regulations Explained
-
 Service
Custom Gunsmithing, Barrel Modifications, and AR-15 Upgrades Guide
-
 Owning
Target Shooting & Clay Sports Guide: Air Rifles, Ranges & Eye Protection
-
Storage
Essential Firearm Storage, Cases, Recoil Pads, and Rig Systems
-
 Safety
The Ultimate Guide to Shooting Hearing Protection and Electronic Earmuffs
-
 Owning
Dry Fire Training Systems, Timers, and At-Home Practice Routines
-
 Owning
State Firearm Rules, Training Courses, and Range Guidelines
-
Owning
Essential Tactical Gear, EDC Equipment, Shooting Gloves, and Range Bags
-
 Owning
Everyday Carry Holsters and Wearable Gear: A Practical Selection Guide
-
 Owning
CCW Permits, Licensing Laws, and Background Check Fingerprinting Guide
-
 Storage
Firearm Safes and Secure Storage: Humidity Control, Security Standards, and Storage Solutions